Images are commonly rejected for microstock because they are 'lacking in sharpness overall' or 'could be improved with better focus'. The reasons can sometimes be baffling even to a relatively experienced microstock contributor especially when the image looks on first inspection sharp. Here is some help with the usual culprits. Assuming that the subject of the image is sharp when viewed at 100% then have a look for the following which might have caused the rejection:
Rejected: Soft overall
F32 is nice when it comes to getting everything in 'focus' but it's also great for making things soft overall. It depends on the lens, but most lenses are not too crisp when closed or open all the way.
1) Use a prime lens, fewer lens elements usually make for sharper images than zoom lenses.
2) Stick with a sharper aperture and bring your subjects closer to the same plane, having subjects spaced far apart will mean that you have to make your depth of field large using a narrow aperture. This doesn't mean that you have to write-off all creativity and keep everything an equal distance from the camera, you can create a feeling of depth even if subjects are not too distant from each other using light and/or colour (or just different sized objects as in a forced perspective architecture). You will notice that interiors are often shot with lights turned on in 'distant' rooms, and darker foregrounds, this draws the eye thought the photo creating the feeling of depth even while the actual room is only a few metres away.
Rejected: Subject not in sharp Focus
Selective focus - keeping part of the photo in focus and throwing the rest of the photo (a foreground or background) out of focus. This technique can produce some attractive images, but it's somewhat subjective, reviewers will regularly reject such images, usually because:
1) Landscapes: selective focus does not work too well with landscape photos especially for documentary style stock.
2) Eyes and nose are not in sharp focus: unless the person is in the background and completely out of focus then the eyes are critical and must be sharp.
3) Depth of field is not sufficiently small or is too small. You need to make sure that out-of-focus portions are sufficiently out-of-focus but not too blurred, one extreme will look like sloppy photography with incorrect choice of aperture and the other will cause the out of focus elements to be distorted beyond recognition and possibly make the whole of the image soft if the lens has been fully opened to create the effect.

Motion Blur or Mirror Shake
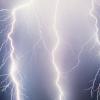
Having the camera on a tripod will not make the image sharp if while tripping the shutter you nudge the camera or worse when the mirror flips up it shakes the camera and subtly blurs the image. Depending on your subject there are one or more ways around it. It's obvious when shake has caused noticeable streaking, but it's not so clear when vibrations have just caused a subtle softening of the image - I find that one easy way to tell is to have a look at distant point sources of light (night and twilight shots obviously) to see if they have a... for want of a better description, 'sperm' shape.
1) Use a tripod, self timer or remote release cord, AND use mirror lock-up mode. Releasing the shutter two or so seconds after the mirror has flipped will stop any mirror shake and the self timer or remote release will make sure that you don't vibrate the camera yourself.
2) Get a faster lens, or use a prime lens, these are faster (allow more light into the camera) produce better images when open to something like F5.6 or wider. This is the reason that sports photographers pay $1000's to get a 250mm lens with no zoom! Sometimes it's just not possible to take stock quality images of subjects like wildlife without investing specialist lenses.
If you do attempt a motion blur effect, make sure the subject is sharp focused and unblurred, and that the background is 'obviously blurred'. If the background is just a little burred then the effect will just look like bad photography.
Sweet Spots
You could get obsessive compulsive about lens specifications, and indeed the sites listed below appear to be written by such people (or there is some sort of lens fetish that don't know about) Either way each of your lenses will have apertures and angles (for zoom lenses) which produce nice crisp images. Often the extremes of zoom and aperture produce less sharp results than the middle settings. There are a few sites that specialise in lens reviews and ratings:
Nikon Lens Tests (Sorry cannon users, ken does review cannon but not in such detail) Ken Rockwells Archive of Lens Reviews (Recommended!)
dpreview.com/lensreviews great lens reviews, unfortunately not all that many lenses covered, worth a visit just to look at the "review sharpness applet" and see how changing aperture affects resolution.
popphoto.com only recent lenses here (well it is popular photo after all) a collection of detailed reviews of currently available lenses.
photodo.com despite a simplistic look to the site the reviews contain quite a lot of useful info, plus user reviews.
DIY Measurements
Alternatively you can get a good idea of the best apertures and lens angles (zoom lenses) for your lens by taking test photos of something like a brick wall and comparing images. Start with something like wide open and closed up tight apertures to see if you can spot the difference (you should be able to!!!); then take a series at all different apertures and compare. Professional tests would use a frequency grate or graticule to accurately measure the resolution of the lens at different settings.


It's quiet in here! Add new comment